In this week's release, meet our latest exciting new feature: Campaigns, invite people outside of your company to work with you and join your Qorus Hub, enjoy improvements to your favorite saved searches and to the Home pane in your Qorus Add-ins, and as usual, some bug fixes.
Meet the all new Campaigns
Campaigns are a lot like favorite or saved searches. Except that favorite searches are personal, created by you, only seen by you and can only be used by you. With Campaigns, the search criteria you save gets shared with everyone in your Qorus Hub, so they can see and use the search criteria you've defined, to quickly access a curated collection of content.
This is especially ideal for Marketing teams, who no longer need to explain to Sales teams how to search for and access the latest marketing content. By creating a Campaign, Marketing can neatly tie a bow around all the different pieces of collateral scattered across SharePoint Online, or OneDrive for Business, and empower Qorus users to access that collateral in just one click.
Here's how to create a Campaign:
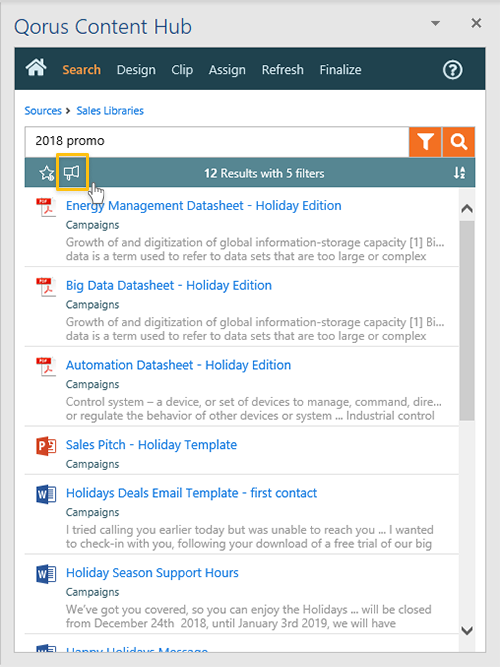
First use the Search to locate all the files that you want to add to your Campaign, then click on the 'Add Campaign' button when you're ready.
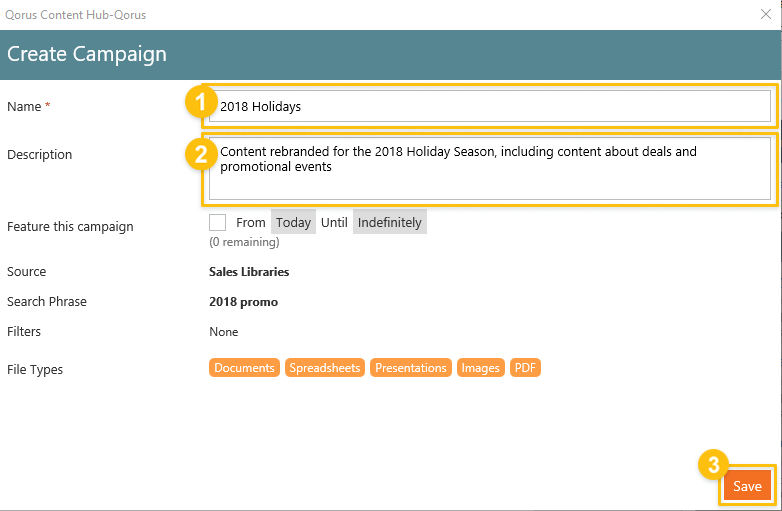
Next, in the pop-out window, give your Campaign a name and a description. When you're ready, go ahead and save it:
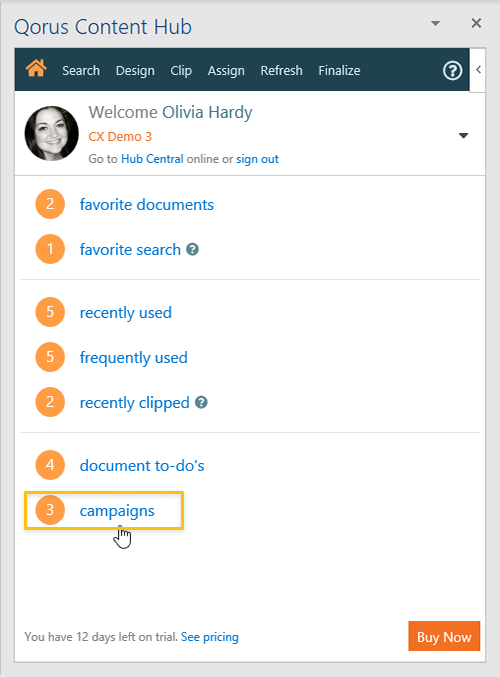
Now all users in your Qorus Hub can access your Campaign by clicking on 'campaigns' in the Home pane:
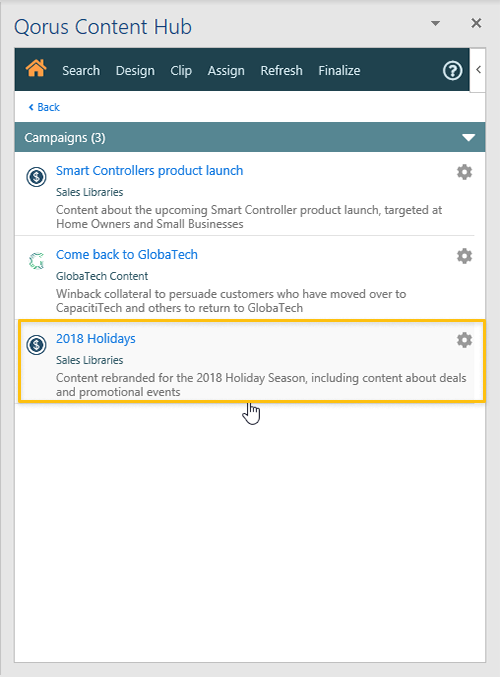
And then pick your Campaign from the list to execute the same search that you did when you created your Campaign:
Invite external users to join your Qorus Hub
Previously, you could only invite co-workers that work in the same organization as you, and that are part of the same Office 365 subscription, to join Qorus.
Now, if you have shared any of your SharePoint Online sites and/or content with people outside of your organization, and those people also use Office 365, then you can add invite them to join your Qorus Hub.
All you need to do is:
- First, in SharePoint Online, share your site or share files and folders
- Then, in Hub Central, go to Settings > User Management, and click on 'Add user'. On the next page, type the first few letters (at least three) of the person's name and click on 'Search' to find them:
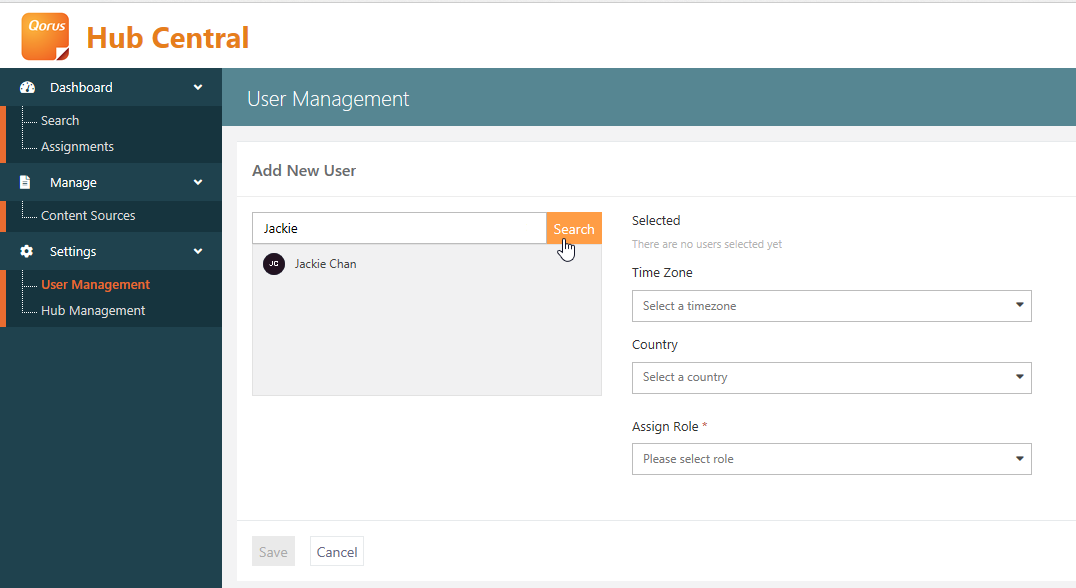
Then it's just a matter of clicking on their name to confirm you want to add them, selecting a time zone, country and user role. Click here to see all the steps involved in adding users.
Home Pane Improvements
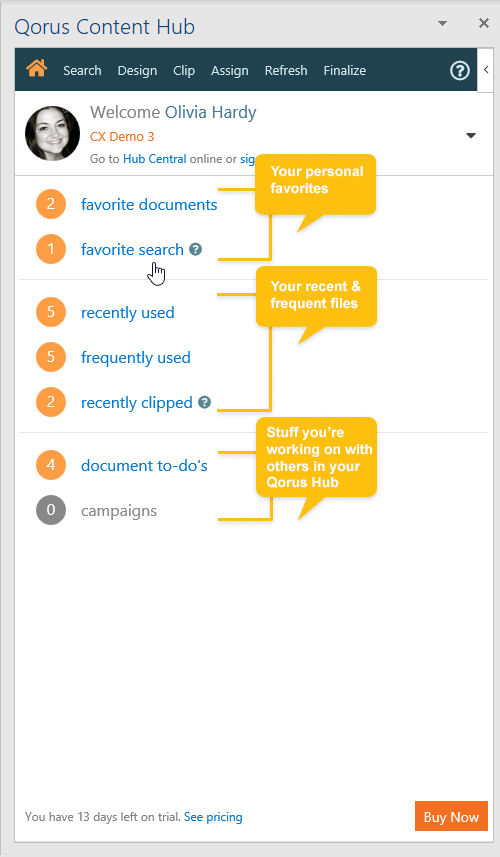
We've also organized things a little better in the Home Pane as part of this release:
Favorite Saved Search Improvements
And then lastly, you'll notice that we've made some improvements to Favorite Searches.
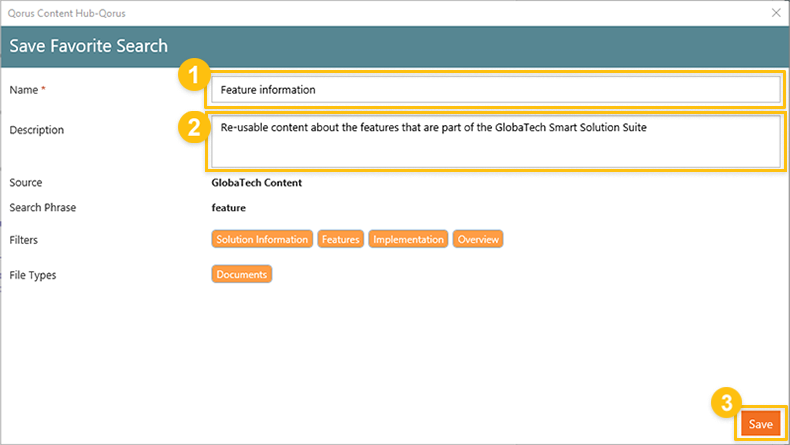
You can now add descriptions:
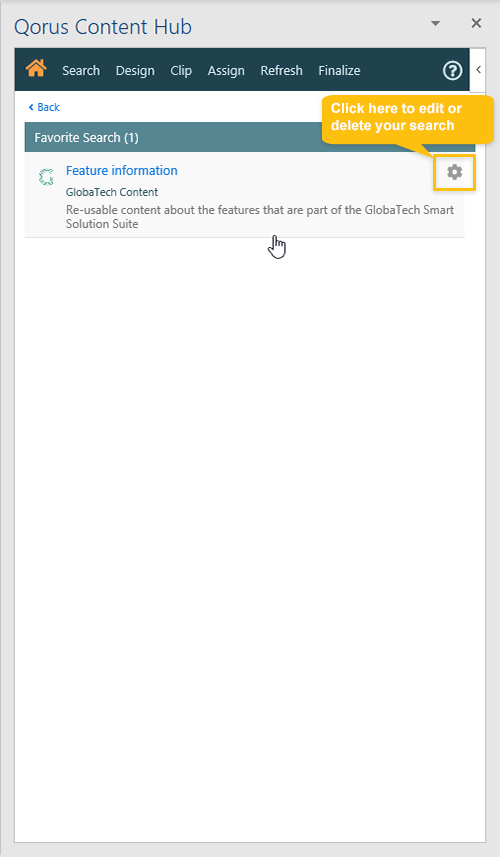
You can also now easily edit the name and description at any time, or delete your Favorite Search, by clicking on the gear icon to the right:
Comments
Please sign in to leave a comment.